🌉 How to set up Cantilever
Cantilever is Spirit Studios' simple-to-use Minecraft ↔ Discord bridge. This guide covers how to install it on a Minecraft server.
1. Preparation
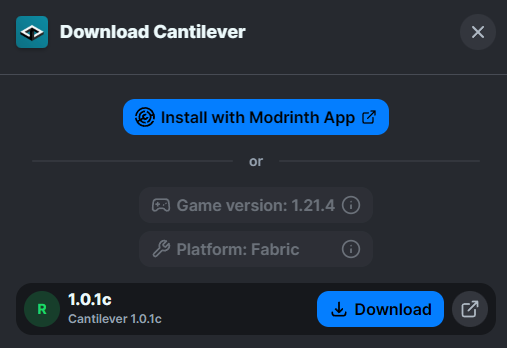
With a fully set up Fabric Minecraft server (or equivalent) on a compatible version, download the latest version of Cantilever. Make sure to also download a compatible version of Fabric API.
2. Configuration
Put the downloaded JAR in your server mods directory and cycle a launch. The server should log an error (or safely crash on earlier versions) if not configured.
Here's an example of a Cantilever configuration file. It can always be accessed from
<SERVER ROOT>/config/cantilever.json.
# Your discord bot token. Read the tutorial at https://docs.spiritstudios.dev/use/cantilever for more info.
# default: <YOUR_BOT_TOKEN>
token = "<YOUR_BOT_TOKEN>"
# You can get this TrackedValue by enabling developer mode in discord and right-clicking the channel you wish to use as your bridge.
# default: 123456789
channelId = 123456789
# Use %s in your TrackedValue to slot in the game event text being sent.
# default: **%s**
gameEventFormat = "**%s**"
# Use a first %s in your TrackedValue to slot in a username, and a second to slot in the chat message content.
# default: <@%s> %s
gameChatFormat = "<@%s> %s"
# Use a %s to slot in the skin texture ID / username for your head service of choice!
# default: https://vzge.me/face/256/%s.png
webhookFaceApi = "https://vzge.me/face/256/%s.png"
# The delay for sending a message from Discord to Minecraft in milliseconds. Set up to make sure that Webhook related Discord Bots such as PluralKit may send messages from users..
# range: 0 - 9223372036854775807
# default: 0
d2mMessageDelay = 0
# The status message to show on the bridge bot
# default:
statusMessage = ""
# The activity type to show on the bridge bot
# options: PLAYING, STREAMING, LISTENING, WATCHING, CUSTOM_STATUS, COMPETING
# default: PLAYING
activityType = "PLAYING"
# Whether to use nicknames defined by players or Minecraft account name on Discord
# default: true
useMinecraftNicknames = true
# A map of text to text replacements from MC -> Discord; useful for Styled Chat Emoji
m2dReplacements = {}
# A map of text to text replacements from Discord -> MC; useful for Styled Chat Emoji
d2mReplacements = {}
If this looks daunting, don't worry. The only values that should be of importance are token and channelId.
3. Let's make a bot!
Go to discord.dev and navigate to the Applications tab in the sidebar. Create a bot and stylise it to your liking! Once there, copy the token into your configuration. It should look like a random string of characters.
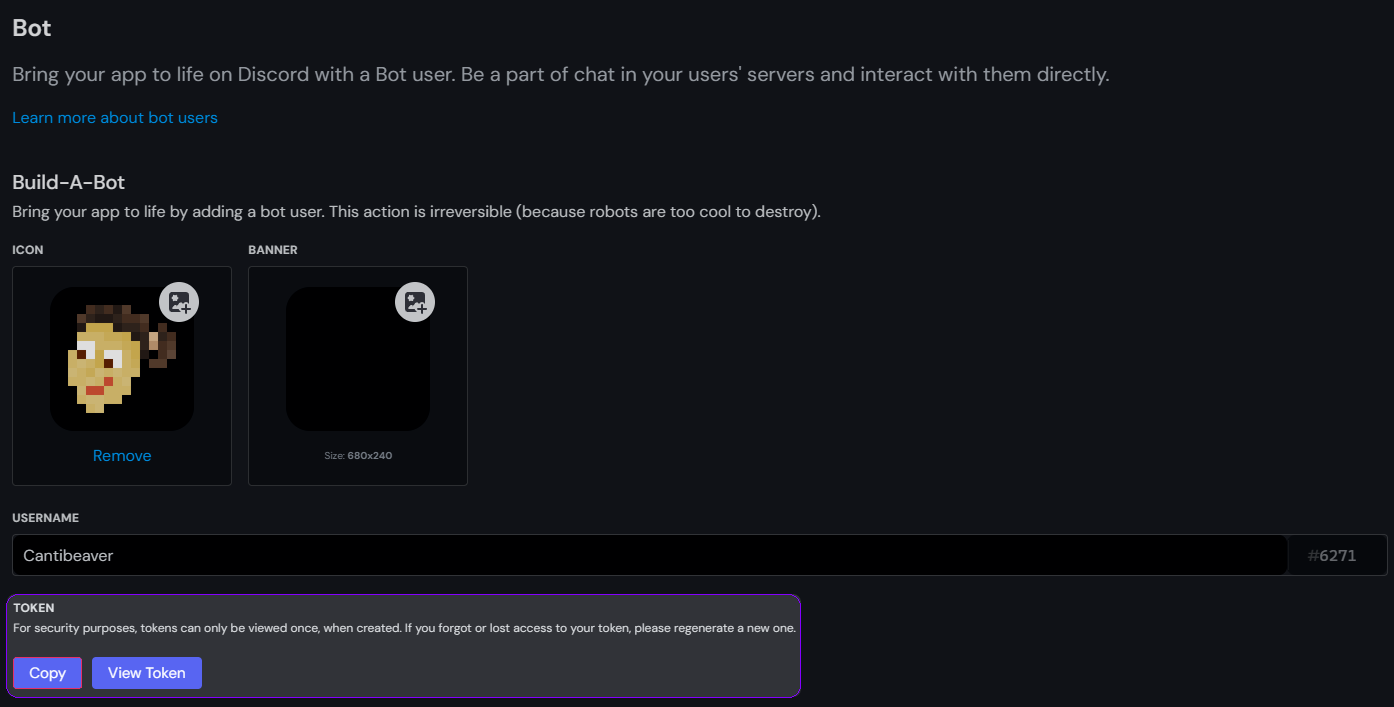
After putting the token in your configuration under token, (the token lets Cantilever talk to Discord) scroll down to the PRIVILEGED GATEWAY INTENTS section of the page. Make sure that MESSAGE CONTENT INTENT is switched on.
Next, go to the Discord channel you want to use as your bridge chat. With developer mode enabled, right click the channel and click Copy Channel ID. Put this in the channelId part of the configuration file.
WARNING
Make sure not to EVER share your bot token with anyone. It provides unrestricted access to your bot unless reset.
4. Finishing touches
Next, grab your APPLICATION ID from the General Information tab. For convenience, we have a little tool to make adding a Cantilever bot to your server a little easier:
Alternatively, you can add the bot to the server by:
- Going to cantilever.spiritstudios.dev and using your
APPLICATION ID - Navigating to
https://discord.com/oauth2/authorize?scope=bot+applications.commands&permissions=536938496&client_id=<YOUR APPLICATION ID>
Once the bot is in your server, make sure it has the following role permissions:
- Send Messages
- Read Message History
- Manage Webhooks
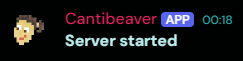
After finishing all of that, start up your server one last time and you should have a working bridge between Minecraft and Discord. Enjoy!